
At its heart, an amplifier for voice is the engine that drives any public address (PA) or voice alarm system. It's a specialist piece of kit built to take the audio signal from a microphone and give it enough power to make speech clear and easy to understand, whether that's across a noisy room or a large open space.
Why a Dedicated Voice Amplifier Is Essential
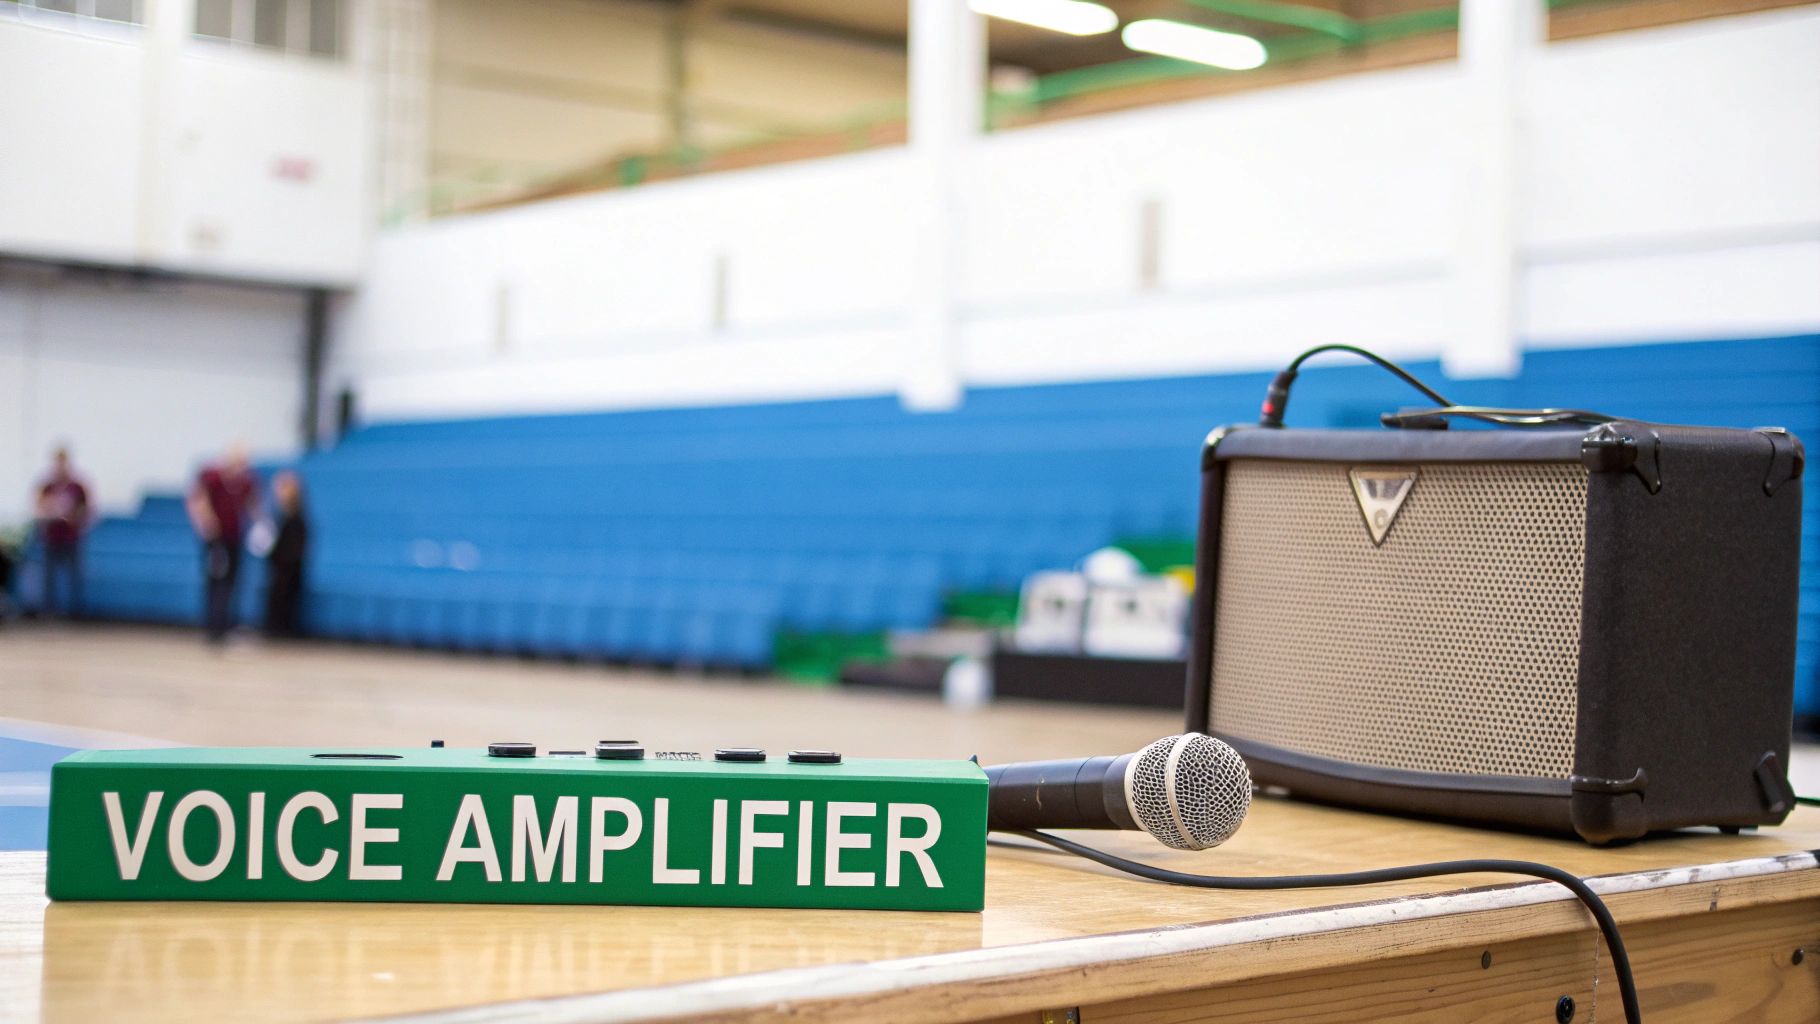
Think about it – from school assembly halls to announcements in a shopping centre, the goal is always the same. You need the spoken word to cut through any background chatter with absolute precision.
If you don't have effective amplification, a voice can easily get lost, muffled, or distorted. This doesn't just make an announcement ineffective; in an emergency, it can have serious safety consequences. It's tempting to think any old hi-fi amp will do the job, but they're built for the wide frequency range of music and just can't deliver the focused clarity needed for human speech.
The Core Purpose of Voice Amplification
A proper amplifier for voice is engineered from the ground up to handle the specific frequencies of human speech. Its main jobs are pretty straightforward:
- Boost the Signal: It takes the very weak electrical signal from a microphone and gives it the grunt needed to power multiple speakers.
- Improve Intelligibility: It zeros in on the frequency range of the human voice (which is typically 300 Hz to 3.4 kHz), making sure every consonant and vowel is distinct and understandable.
- Overcome Noise: It provides enough volume for the voice to sit clearly above background noise, whether that's the din of a busy restaurant or the hum of machinery in a factory.
The key takeaway is this: an amplifier for voice isn't just about making things louder; it's about making them clearer. Intelligibility, not sheer volume, is the true test of a great voice reinforcement system.
From Historical Roots to Modern Systems
The need for clear public communication has a long history here in the UK, with voice amplification systems really coming into their own during the mid-20th century for big civic events and rallies. By the 1990s, it was estimated that around 30-40% of public venues in the UK used some form of voice reinforcement.
Fast forward to today, and that figure has jumped to nearly 60-70%, showing just how critical these systems have become in our daily lives. You can dive deeper into this journey by exploring the history of the UK speaker and amplifier market. This evolution marks a fundamental shift away from simply making things loud to creating sophisticated, tailored systems for specific jobs, from background music with voiceovers to fully certified life-safety voice alarms.
Making Sense of the Numbers: Core Amplifier Specs for Clear Voice
To choose the right amplifier for voice, you first need to get your head around the numbers on the spec sheet. These aren't just abstract figures; they're the DNA of your audio system, directly impacting how clear, reliable, and effective it will be. Let's break down the essential specs in a way that actually makes sense.
It's no surprise that the UK's audio amplifier market is growing steadily, with a projected growth rate of around 4.5%-5% over the next five years. Everyone from high-street shops to massive venues is chasing clearer, better-quality audio, which shows just how vital the right amplification has become. You can dig into the numbers yourself and find out more about the UK audio amplifier market on researchandmarkets.com.
How Much Power (Watts) Do You Really Need?
The first number everyone looks at is the power rating, measured in Watts (W). But it's not just about being loud. It's about having enough power to deliver clean, intelligible sound at the right volume for your specific space, without distortion.
Think about it this way: a tour guide with a small battery-powered megaphone is fine for a handful of people. Try using that same megaphone in a cavernous school hall, and it’s completely useless. The hall needs a proper amplifier with enough grunt to fill the space so every single person can hear clearly, without the amp breaking a sweat.
- Small Spaces (e.g., a meeting room or boutique shop): A lower-powered amp, maybe 30-60W, is usually plenty.
- Medium Spaces (e.g., a restaurant or classroom): You'll probably be looking in the 60-120W range.
- Large Venues (e.g., a warehouse or community hall): This is where you need serious power, often 240W or more, to get proper coverage.
This is just a rough guide, of course. A proper calculation would factor in speaker sensitivity and background noise, but it’s a solid place to start.
The Mystery of Impedance (Ohms)
Impedance, measured in Ohms (Ω), is probably the most critical yet misunderstood spec of them all. In simple terms, it’s the electrical resistance of your speakers.
Here’s an easy way to picture it:
Imagine your amplifier is a water pump and the speaker is a tap at the end of a hose. If the hose (speaker cable) and tap (speaker) are too narrow (high impedance), the pump has to work incredibly hard to push the water through. This strain makes the pump overheat, and eventually, it’ll just give up.
That's exactly what happens to an amplifier. Matching the amp's output impedance to the total impedance of your speakers is non-negotiable. It's the number one rule for system stability, and getting it wrong is the quickest way to kill an amplifier.
To help you get a handle on the key numbers, here’s a quick-glance table breaking down what really matters for voice applications.
Key Amplifier Specifications for Voice Applications
| Specification | What It Means for Voice | Typical Requirement |
|---|---|---|
| Power (Watts) | The ability to deliver clean, undistorted sound at the required volume for the space. | 30W-60W for small rooms; 120W+ for larger venues. Must be matched to speaker sensitivity and ambient noise. |
| Impedance (Ohms) | The electrical load the speakers present to the amplifier. Mismatching causes overheating and failure. | Must match speaker load. 8Ω for low impedance; 100V/70V for distributed systems. |
| Headroom (dB) | The reserve power to handle sudden loud peaks (e.g., a shouted alert) without distortion. | Aim for 3dB of headroom, which means an amplifier with double the power of the system's typical operating level. |
| THD+N (%) | Total Harmonic Distortion + Noise. A measure of how "clean" the sound is. Lower is better for intelligibility. | Look for <1%. For high-clarity systems, <0.5% is ideal. |
| Frequency Response | The range of frequencies the amplifier can reproduce accurately. Voice sits mainly in the mid-range. | A range like 80Hz - 15kHz is more than adequate for pure voice applications. |
These specs all work together. A powerful amp is no good if it's distorting or can't handle the speaker load you've connected to it.
Why You Can’t Ignore Headroom
Ever heard a PA system crackle and distort the moment someone speaks with a bit of urgency? That's what happens when an amplifier runs out of headroom.
Headroom is the extra power an amplifier keeps in reserve to handle sudden, loud peaks in the audio without clipping the signal into a distorted mess. For voice, this is absolutely crucial. A calm, measured announcement uses far less power than a sudden, shouted emergency instruction.
An amp with enough headroom ensures that even the most urgent messages stay perfectly clear and understandable. A good rule of thumb is to choose an amplifier that can deliver about double the power your system needs for day-to-day use. So, if your speakers require 100W for normal announcements, a 200W amplifier gives you a healthy 3dB of headroom.
This is a key consideration in professional gear. You can see how these specs come together in the real world by looking at the design of a 4-zone multifunctional mixing amplifier, which is built to handle these demands.
Remember, though, that even the best amplifier in the world can't fix bad audio at the source. If your input signal is noisy, the output will be too. It’s always worth looking into techniques for removing background noise from voice recordings to ensure you’re feeding the system the cleanest possible signal.
Comparing 100V Line and Low-Impedance Systems
When you're specifying an amplifier for voice, one of the first big decisions is whether to go for a 100V Line system or a Low-Impedance setup. Getting your head around the basic difference between them is the key to designing a system that works perfectly and won't let you down. Neither one is better than the other; they're just different tools for different jobs.
A good way to think about it is like choosing a vehicle. A low-impedance system is your high-performance sports car: powerful, precise, and perfect for an amazing audio experience over a short distance. On the other hand, a 100V line system is more like a long-haul lorry. It’s incredibly efficient and designed to cover huge distances with a heavy load, focusing on consistency over raw speed.
This hierarchy diagram shows how the core amplifier specifications—power, impedance, and headroom—all flow from the amplifier itself to determine the final system performance.
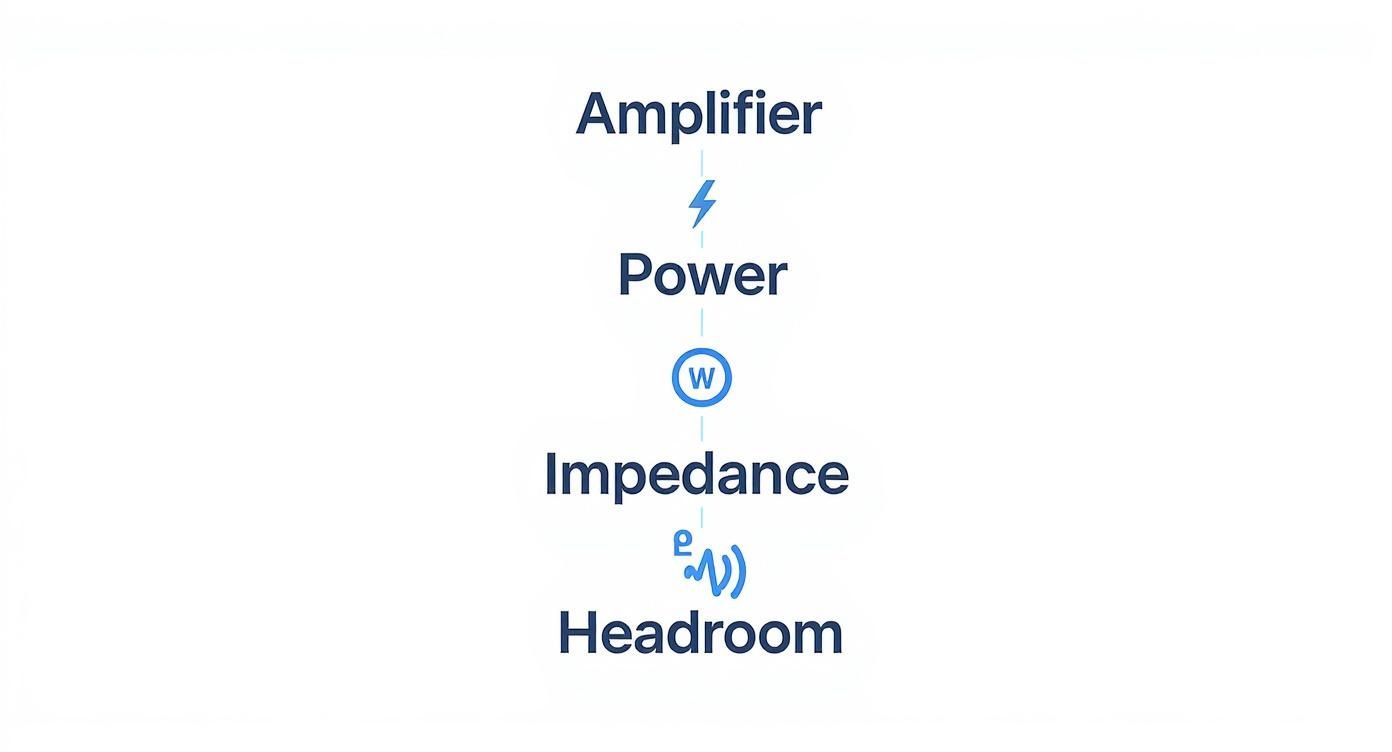
It’s a great visual reminder that every spec is a critical link in the chain. A weakness in one area, like getting the impedance wrong, can bring the whole setup to its knees.
The Workhorse: 100V Line Systems
For any large-scale, distributed audio project, the 100V line system is the undisputed champ. It’s the go-to standard for any environment where you need to run lots of speakers over very long cable distances.
How does it work? A transformer inside the amplifier steps up the audio signal to a high voltage (100V). Then, each speaker has its own little transformer to step the voltage back down. This high-voltage, low-current approach is brilliant because it massively cuts down on power loss over long cables, working much like the national grid does to send electricity across the country.
Key Advantages of 100V Line:
- Long Cable Runs: You can run speaker cables for hundreds of metres without any noticeable signal drop.
- Simple Wiring: All the speakers are wired in parallel, which makes adding or removing them a breeze. There are no complicated impedance sums to worry about – you just have to make sure the total wattage of all the speaker tappings doesn't go over the amplifier's power rating.
- Scalability: It’s incredibly easy to connect dozens, or even hundreds, of speakers to just one amplifier channel.
This makes 100V the perfect choice for shopping centres, schools, airports, and massive warehouses. Basically, anywhere you need consistent background music and crystal-clear announcements across a huge area.
The High-Fidelity Choice: Low-Impedance Systems
Low-impedance systems, usually running at 4Ω or 8Ω, are all about one thing: sound quality. They connect the amplifier directly to the speakers with no transformers getting in the way of the signal path. The result is a purer, more dynamic sound with a much better frequency response.
The trade-off is that this direct connection is very sensitive to power loss over distance. You have to keep your cable runs as short as possible, generally under 15-20 metres, to stop the signal from degrading. The wiring is also a bit more involved, as you have to carefully calculate the total impedance of all your speakers to make sure it’s a perfect match for the amplifier's specified load.
A low-impedance setup is the audio equivalent of a short, wide pipeline. It can deliver a high volume of high-pressure water (the audio signal) with incredible force, but only over a limited distance before the pressure drops off.
This focus on quality makes low-impedance the only real choice for applications where audio fidelity is everything.
Ideal Applications for Low-Impedance:
- Hi-Fi and Home Cinema: For when every tiny detail in the music or soundtrack really matters.
- Performance Venues: The standard for stage monitors and front-of-house systems in bars, clubs, and small theatres.
- Premium Retail: In high-end boutiques where top-quality background music is part of the brand experience.
- Boardrooms: To get that perfectly clear voice reproduction during important video conferences.
For many commercial installs, ceiling speakers are the obvious choice. Knowing how to wire them correctly is vital, whether you've gone for a 100V or low-impedance system. To get it right, you can learn more by checking out our guide on the best way to approach a ceiling speaker and amplifier setup. Nailing the fundamentals of wiring and impedance matching is absolutely essential for the system's performance and long-term reliability.
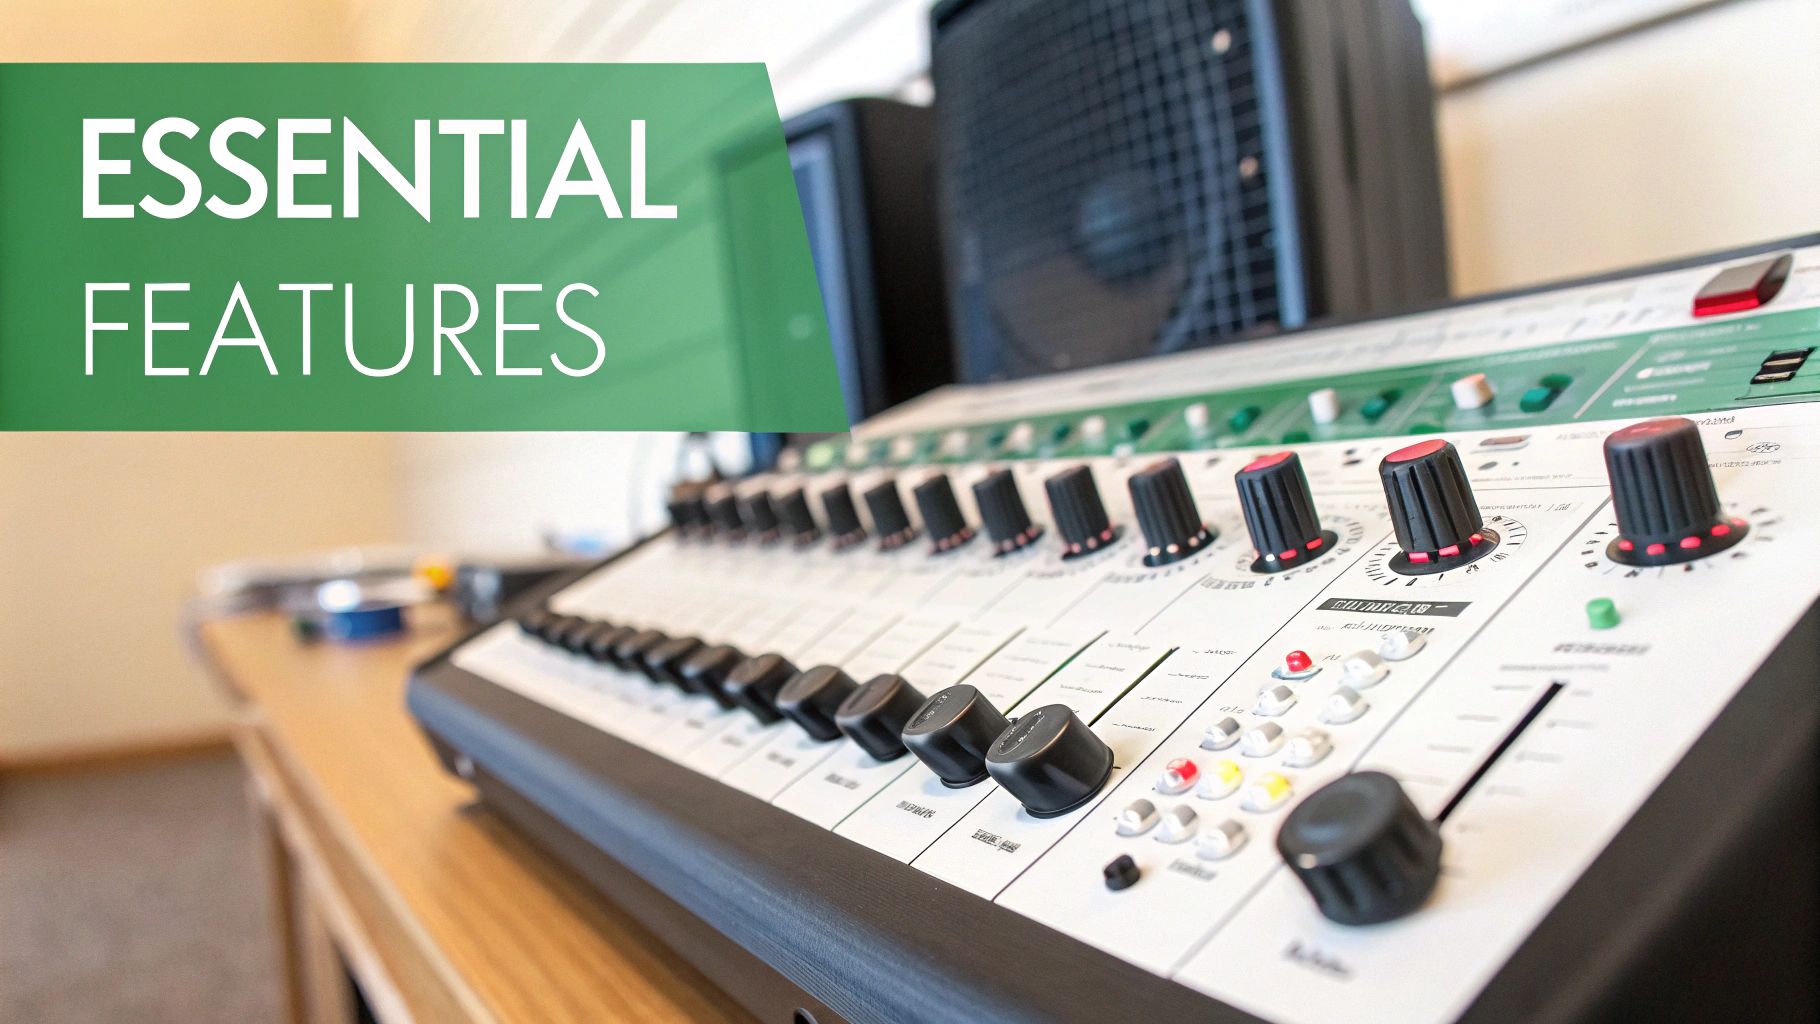
Must-Have Features for Modern Voice Systems
Beyond the raw numbers of power and impedance, what truly makes a voice amplifier shine in the real world is its feature set. The right inputs, controls, and routing options are what elevate a simple power block into an intelligent audio hub, capable of handling the dynamic needs of any modern space.
Getting to grips with these features is essential for specifying a system that doesn't just work on day one, but keeps performing for years to come. It’s all about building in the functionality that makes day-to-day operation seamless and reliable.
Understanding Input Types: Mic vs Line
One of the most fundamental concepts—and a common point of confusion—is the input selection. Amplifiers built for voice applications will always have different input types, mainly Mic level and Line level.
A microphone puts out an incredibly weak electrical signal. To be useful, it needs a special input with a pre-amplifier to boost it to a healthy level without adding a load of unwanted noise. That’s your Mic level input.
In contrast, devices like music streamers, laptops, or CD players produce a much stronger signal, known as Line level. If you plug a line level source into a sensitive mic input, you'll get a loud, distorted, and frankly unusable mess. Do it the other way round—plug a mic into a line level input—and you’ll barely hear a thing.
Getting this right is the first step to clean, clear audio. Most professional amplifiers feature switchable inputs or dedicated sockets for each, ensuring every source is handled correctly for maximum clarity.
The Power of Priority and Ducking
For any venue that plays background music, priority ducking is an absolute game-changer. It’s the magic ingredient that makes public address systems work so well in places like retail stores, restaurants, and transport hubs.
Picture a busy shop with background music setting the mood. A staff member needs to make an announcement. As soon as they speak into the priority microphone, the amplifier automatically detects the signal.
The amplifier then smoothly and automatically lowers—or "ducks"—the music volume, allowing the voice announcement to be heard clearly. Once the announcement is over, the music gently fades back to its original level.
This single feature ensures crucial messages are never drowned out and that the whole process feels professional and slick. It's a non-negotiable for any multi-use environment.
Advanced Control with Zoning and Matrixing
When system requirements get more complex, you need independent control over audio in different areas. This is where zoning and matrixing come into their own.
-
Zoning: A zonal amplifier lets you split a building into separate areas, or zones. From a single unit, you can send different audio sources to each zone or just adjust their volumes independently. A restaurant, for instance, might want louder music in the bar (Zone 1), something quieter in the main dining room (Zone 2), and only paging announcements in the kitchen (Zone 3).
-
Matrixing: A matrix amplifier takes this a step further. It gives you the power to route any input to any output zone—or even to multiple zones at once. This provides the ultimate flexibility for complex venues like hotels or conference centres, where audio needs can change at a moment's notice.
These features transform a simple PA system into a powerful audio management tool, putting the end-user in complete command of their sonic environment.
The Future of Connectivity: AoIP and Dante
Modern installations are rapidly shifting away from traditional analogue cables and embracing Audio over IP (AoIP). The leading protocol in this field is Dante, which allows high-quality, uncompressed audio to be transmitted over standard network infrastructure.
An amplifier with a Dante input can receive audio from anywhere on the network, which dramatically simplifies wiring runs and makes the whole system more flexible. To see what’s possible, it’s worth exploring the latest Dante Audio over IP solutions from Monacor to understand how this technology is reshaping system design. This network-based approach really is the future of professional audio.
Getting to Grips with Voice Alarm and EN 54-16 Compliance
When an emergency hits, clear, calm instruction isn't just a nice-to-have—it saves lives. This is exactly where a standard Public Address (PA) system just doesn't cut it, and a dedicated Voice Alarm (VA) system becomes absolutely critical. A VA system isn't for background music or general announcements; it's a life-safety solution, built from the ground up to deliver unambiguous evacuation instructions when it matters most.
Your average amplifier for voice is designed for day-to-day use. But a VA amplifier is engineered for total reliability under the worst possible conditions. The standard that governs these systems across Europe and the UK is EN 54-16. This isn't just a guideline; it’s a strict set of rules dictating every single aspect of the system's design, performance, and resilience.
For any professional installer or system specifier, understanding EN 54-16 is a massive responsibility. Fitting a non-compliant system in a building that legally requires a certified VA setup isn't just a technical blunder—it carries serious legal and moral consequences. The ultimate goal is simple: ensure every instruction is heard and understood, every single time, without fail.
The Core Idea Behind EN 54-16
At its heart, the EN 54 standard is all about one thing: guaranteed performance in an emergency. It goes way beyond the basic functions of a regular PA system by demanding a whole host of features that ensure the system's integrity is never compromised. These aren't optional extras; they're the absolute foundation of a life-safety system.
The standard insists that the entire signal path—from the emergency microphone right through to the last speaker—is constantly monitored. If any part of it fails, whether it's a single speaker line or an entire amplifier channel, the system has to spot the fault instantly and flag it up to the operator. This self-monitoring is what really separates a true VA system from a standard PA rig.
An EN 54-16 system is designed to never fail silently. It must constantly report on its own health, ensuring that when an evacuation is triggered, it's fully operational and ready to do its life-saving job.
What's Needed for Compliance?
To earn that EN 54-16 certification, an amplifier for voice and all its control gear have to meet a list of non-negotiable criteria. These rules are designed to get rid of any single points of failure and keep the system running even when things go very wrong.
Here are some of the key mandatory features:
- Full System Supervision: The system must constantly check for open and short circuits on every speaker line.
- Amplifier Redundancy: A standby amplifier must be on hand, ready to take over immediately if a main one fails.
- Dual Power Sources: The system needs to run on both mains power and a secondary battery backup, which has to keep it going for a specific amount of time during a power cut.
- Fault Reporting: Any fault it finds must be flagged up with both an audible and a visual warning within 100 seconds.
- Emergency Microphone Priority: The firefighter's microphone has to override every other input, no exceptions.
When you lay it all out, the difference between a standard PA and a life-safety Voice Alarm system becomes crystal clear. This table shows just how big that gap is.
Standard PA System vs. EN 54-16 Voice Alarm System
| Feature | Standard PA System | EN 54-16 Voice Alarm System |
|---|---|---|
| System Monitoring | None. A fault might go unnoticed until you try to use it. | Mandatory. Constantly monitors all critical components and speaker lines. |
| Fault Indication | No requirement. | Mandatory. Audible and visual fault alerts within 100 seconds. |
| Battery Backup | Optional, usually just for user convenience. | Mandatory. Must have a certified battery backup system. |
| Amplifier Redundancy | Not required. A single amp failure can take the whole system down. | Mandatory. Requires a standby amplifier for automatic switchover. |
| Certification | Not designed for life-safety; no third-party certification needed. | Mandatory. Must be independently tested and certified to EN 54-16 standards. |
At the end of the day, specifying and installing an EN 54-16 compliant system is about providing total peace of mind. It’s the guarantee that in a real emergency, the technology will work flawlessly to help guide people to safety.
Common Installation Mistakes and How to Avoid Them

Even the best amplifier for voice on the market can sound dreadful if the installation isn't up to scratch. A genuinely great audio system is built on precision and attention to detail long before anyone flips the power switch. It's all about avoiding the common pitfalls to guarantee that crystal-clear, reliable sound your client is paying for.
So many jobs get tripped up by simple oversights that a solid plan would have caught early on. Whether it's mismatched loads or poor ventilation, these small mistakes can snowball into poor performance, distorted sound, or even a complete system meltdown over time.
Think of this as your field guide to getting it right from the very start. We’ll walk through the most frequent installation blunders and give you a clear path for avoiding them, from power calculations to troubleshooting those head-scratching moments on site.
Calculating Amplifier and Speaker Loads
Getting this right is non-negotiable. You have to correctly match your amplifier's power output to the total load of the speakers connected to it. An overloaded amplifier is an unhappy amplifier, and it will let you know by overheating, clipping, and eventually failing. On the flip side, an underpowered system will just sound weak and gutless, struggling to be heard over any background noise.
For 100V line systems, the maths is refreshingly simple. Just add up the wattage "tappings" of every single speaker on one amplifier channel.
The total wattage of your speakers must never exceed 80% of the amplifier's continuous power rating. That 20% buffer is your safety net, giving you essential headroom for signal peaks and ensuring the amp isn't red-lining all day long.
So, if you're working with a 120W amplifier, your total speaker tappings shouldn't add up to more than 96W (120 x 0.80). Stick to this rule, and you'll prevent the most common cause of amplifier failure and ensure the system has a long, reliable life.
Pre-Installation Best Practices Checklist
A little bit of prep work saves a world of pain later. Before you even think about running a single cable, run through this checklist.
- Confirm Equipment Placement: Is the amp rack going somewhere with decent ventilation? Amplifiers get hot, and stuffing them in a tight, unventilated cupboard is a recipe for thermal shutdowns and fried components. A good rule of thumb is to leave at least one unit of rack space free above and below any high-power amps.
- Verify Speaker Locations: Double-check that your planned speaker layout gives even coverage without pointing directly at any microphones. Placing a speaker so it fires straight into a mic is the fastest way to create a feedback nightmare.
- Check Cable Paths: Plan your cable runs to steer clear of interference. Keep your speaker and microphone cables well away from mains power lines, fluorescent light ballasts, and big transformers. This is how you avoid that dreaded electrical hum.
- Review Power Requirements: Make sure the mains circuit you're plugging into can actually handle the total power draw from the amp and everything else in the rack.
Basic Troubleshooting Steps
Even the most carefully planned installation can throw a curveball. When you hit a snag like hum, feedback, or distortion, don't panic. Just be systematic.
- Isolate the Problem: First things first, turn all the volume levels down and unplug all your input sources. If the noise vanishes, start plugging things back in one by one. The moment the noise comes back, you've found your culprit—a faulty source or a bad cable.
- Check for Ground Loops: That persistent, low-frequency hum is the classic signature of a ground loop. It usually happens when different bits of kit are plugged into different mains circuits. The quickest fix is to power all your audio equipment from a single, good-quality power distribution unit.
- Manage Feedback: That high-pitched squeal or howl is caused by a microphone picking up its own sound from a nearby speaker. The fix is simple: either move the mic further away from the speaker, turn the mic's volume down, or use a graphic equaliser to carefully 'notch out' the specific frequency that's causing the problem.
Your Voice Amplifier Questions, Answered
Getting into the world of commercial audio can throw up a lot of questions. We get it. This section is all about giving you straight-talking answers to the queries we hear most often, so you can specify the right amplifier for voice with confidence and sidestep those common installation headaches.
How Much Amplifier Power Do I Need?
Working out the right amount of power isn't a dark art; it’s about making a sensible match between your amplifier, the speakers, and the space you're working with. For a 100V line system, the calculation is thankfully straightforward and very safe.
First up, you need to add together the wattage tappings of all the speakers you plan on running from a single amplifier channel. Say you've got ten 6W ceiling speakers in the plan – your total speaker load is a simple 60W.
Now for the golden rule: your total speaker load should never push past 80% of the amplifier's rated power. That extra 20% gives you crucial headroom, which stops the sound from distorting when pushed and, just as importantly, prevents the amp from overheating and shutting down.
So, for that 60W load, you’d need an amplifier that can deliver at least 75W (because 60W is 80% of 75W). Grabbing a 100W or 120W amp would be an even better, safer bet.
Why Can’t I Use a Hi-Fi Amp for PA?
Look, the hi-fi amp in your living room is fantastic for what it does, but it's absolutely the wrong tool for a commercial PA system. They are simply built for completely different jobs.
A home hi-fi amp is a low-impedance machine, designed to drive maybe one or two pairs of speakers over very short cable runs, all in the name of perfect audio fidelity. A commercial amplifier for voice, on the other hand, is usually a 100V line workhorse. It's engineered for total reliability, pushing intelligible sound over long distances efficiently, and comes with essential features like priority inputs that automatically duck the music for announcements. They are built for vocal clarity, not for pleasing music purists.
What Is the Best Way to Stop Feedback?
Ah, that ear-splitting squeal of feedback. It’s the enemy of every live sound system, and it happens when a microphone picks up the sound from a speaker it’s connected to, creating a nasty, howling loop. Thankfully, putting a stop to it is usually pretty simple.
- Move the Mic: The easiest fix by a mile. Just increase the distance between the microphone and the nearest speaker.
- Reposition the Speaker: Make sure your speakers aren't aimed directly at any microphone positions.
- Turn It Down: Often, just knocking back the microphone's gain or volume level is enough to instantly break the feedback loop.
Sticking to these basic setup principles is the most reliable way to make sure every announcement is heard clearly and without any unwanted drama.
At Epic Audio Ltd, we don't just sell boxes. We provide the specialised hardware and expert advice you need to design and deliver flawless voice reinforcement systems. Explore our complete range of commercial audio solutions and let us help you specify the perfect amplifier for your next project.