
Getting a ceiling speaker installation right boils down to one thing: meticulous planning. Before you even think about reaching for the tools, a detailed layout plan is your best friend. It’s what ensures you get that lovely, even sound coverage, helps you avoid hitting hidden pipes or joists, and guarantees the final result sounds professional.
Honestly, a solid plan is the difference between a flawless job and a frustrating one filled with mistakes.
Planning Your Layout for Flawless In-Ceiling Audio
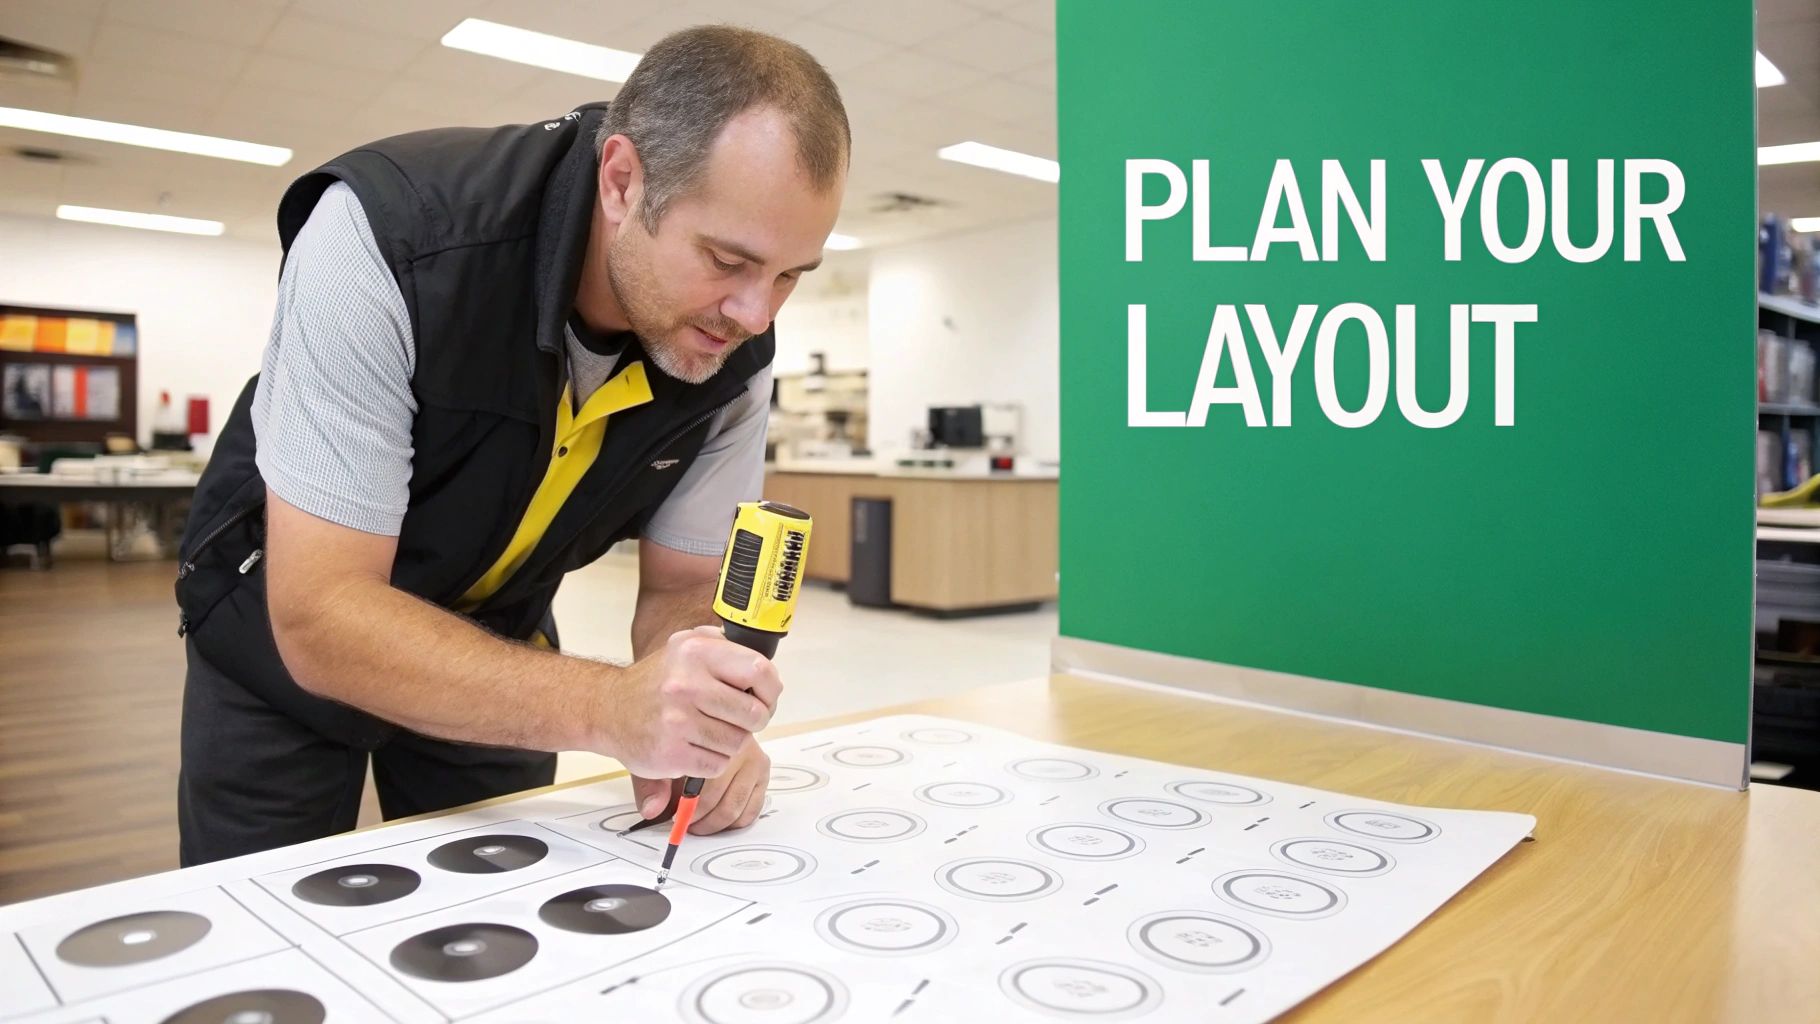
The real secret to incredible in-ceiling audio isn't just buying great speakers; it’s all about where you put them. This pre-installation phase is where a project is won or lost. I’ve seen it countless times – rushing this stage leads to wonky layouts, patchy sound, and the unenviable job of patching up holes cut in the wrong place.
A thorough site survey is absolutely non-negotiable.
This means walking the space, whether it's a retail shop, an office, or a restaurant, and getting a feel for its unique quirks. You're looking for potential acoustic dead spots and any physical obstructions that will get in your way.
Here’s what you need to nail down first:
- Room Dimensions and Layout: Get the length, width, and ceiling height. Are there any alcoves, L-shaped corners, or big open-plan areas? These will all mess with how sound travels.
- Ceiling Obstructions: Clock all the light fittings, air-con vents, smoke detectors, and sprinkler heads. These are no-go zones for your speakers.
- Listener and Staff Positions: Think about where people will be. In a shop, you want consistent coverage everywhere. But in an office boardroom, the focus is probably just on the main table.
Speaker Spacing for Optimal Sound Coverage
Once you’ve got a clear picture of the room, you can start plotting your speaker locations. The aim is to create an even, overlapping blanket of sound, getting rid of any obvious loud spots or quiet patches.
For background music in a commercial setting, a simple grid pattern is usually your best bet. A good rule of thumb I’ve always followed is to space speakers at a distance roughly twice the ceiling height. So, for a standard 2.4-metre ceiling, you’d be looking at spacing them about 4.8 metres apart.
If you’re aiming for proper stereo imaging, though, you need to be a bit more precise. You’ll want to place speakers at equal distances from the walls along the length of the room, keeping at least 2 metres between them. This helps achieve that perfect stereo separation, which is vital for creating the right atmosphere in retail and hospitality venues that use brands like Fonestar and Omnitronic.
Pro Tip: Always measure from the centre point of where you plan to put each speaker. A laser measure is your best friend here. Mark the spots with painter's tape first – it lets you (and the client) see how it’ll look before you commit to cutting any holes.
Choosing Your System 100V Line vs Low-Impedance
A huge decision you need to make during planning is what type of audio system you’re going to install. This choice has a massive knock-on effect on your wiring, the amplifier you’ll need, and how easily you can expand the system later. Your two main options for commercial jobs are low-impedance (usually 8 Ohm) and 100V line systems.
To make it simple, think of it this way:
- Low-Impedance (8 Ohm): This is what you’d find in a home hi-fi setup. It’s perfect for smaller, single-room commercial jobs where top-notch audio quality is the priority. The signal runs straight from the amp to just a few speakers.
- 100V Line Systems: This is the absolute workhorse of commercial audio. It’s designed to run loads of speakers over very long cable distances from a single amplifier, making it perfect for large, multi-zone spaces like schools, warehouses, and big retail stores. If you need voice announcements, you'll have to find the best amplifier for voice to ensure everything is crystal clear.
Here's a quick breakdown to help you decide.
Choosing Your System 100V Line vs Low-Impedance
| Feature | Low-Impedance (8 Ohm) | 100V Line System |
|---|---|---|
| Best For | Small, single-room setups where audio quality is key. | Large areas, multiple zones, and long cable runs. |
| Wiring Complexity | Simple, but requires thicker, shorter cable runs. | More complex initial setup but uses thinner, longer cables. |
| Number of Speakers | Limited to a few speakers per amplifier channel. | Can connect many speakers to a single amplifier. |
| Audio Quality | Higher fidelity, better for detailed music playback. | Excellent for background music and voice, but less suited for hi-fi. |
| Scalability | Difficult to expand without adding more amplifiers. | Easy to add more speakers to the existing line. |
Ultimately, the scale of the project usually makes the decision for you. A little coffee shop would be perfectly happy with a simple 8 Ohm stereo setup. A sprawling hotel, on the other hand, absolutely needs the flexibility and power of a 100V line system. Getting this right from the start saves a lot of headaches and ensures you don't buy the wrong kit.
Working With Different Ceiling Types And Structures
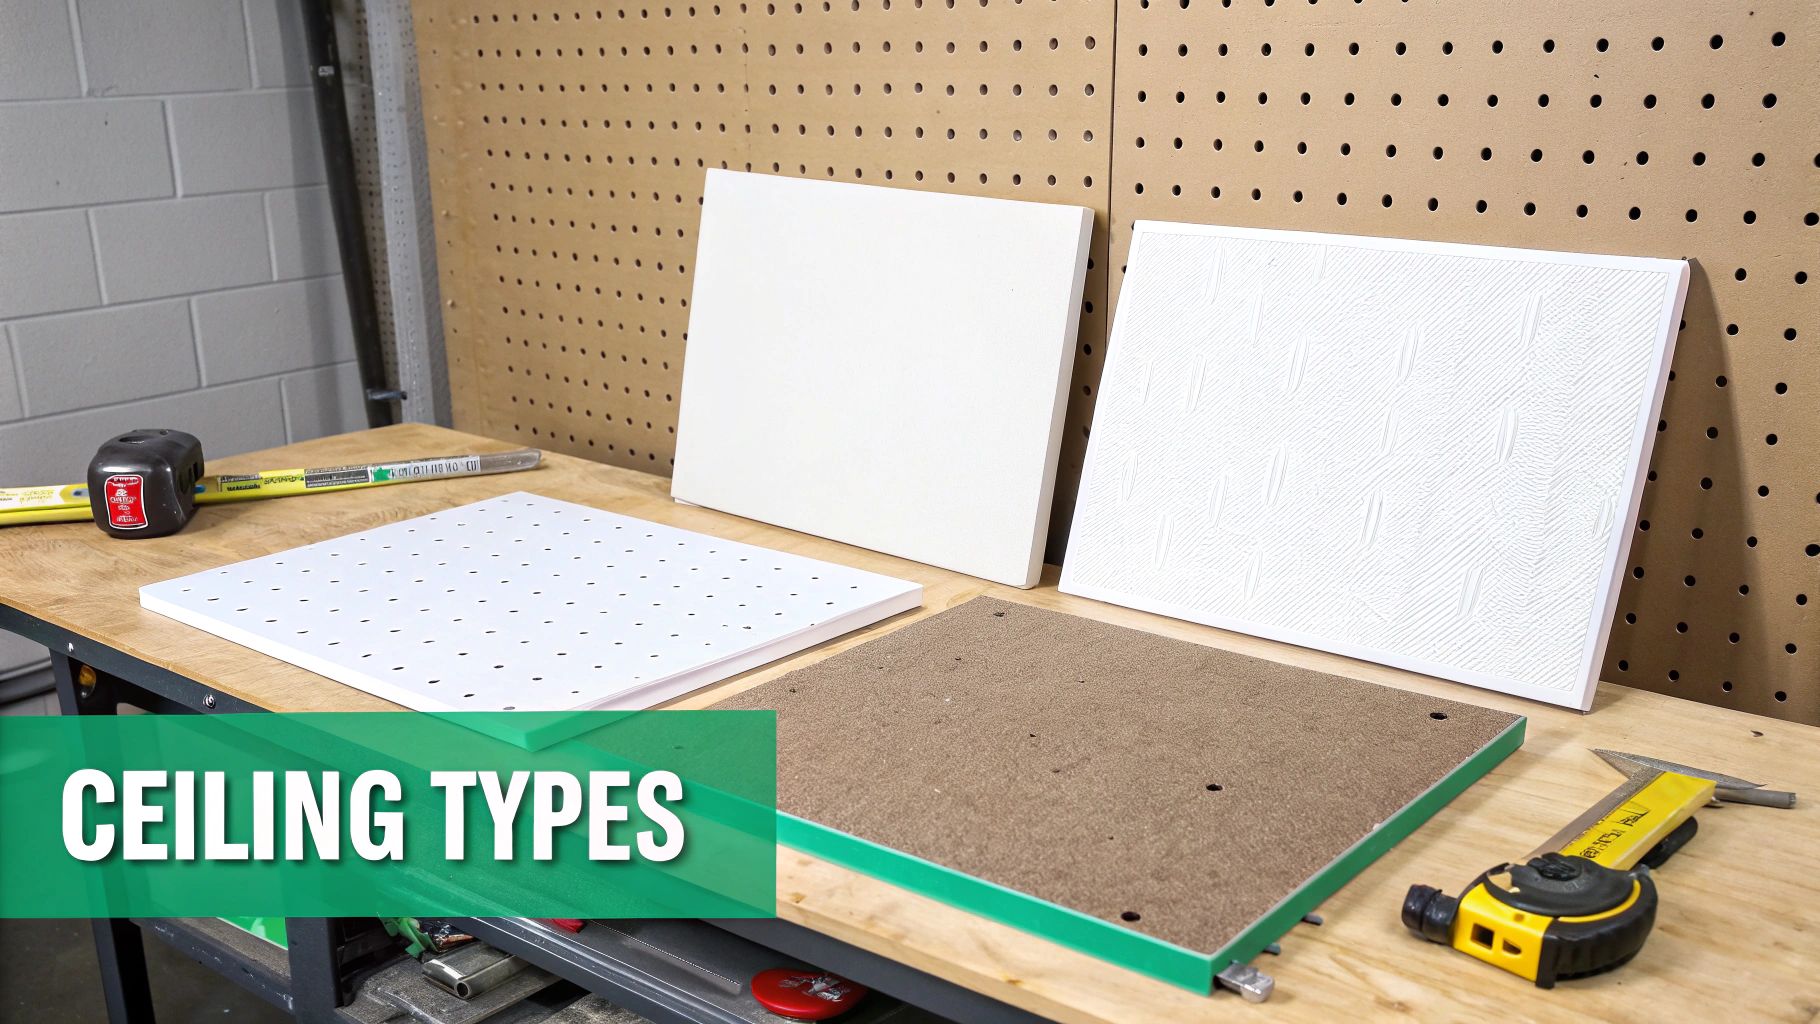
Any experienced installer knows the golden rule: no two ceilings are the same. The material you’re cutting into dictates everything—your tools, your mounting method, and the headaches you might run into. Getting a professional result means adapting your approach on the fly, whether you're in a modern office block or a new-build home.
In the UK, you’ll typically come up against one of three main types: plasterboard, suspended grid tiles, and solid concrete. Each one requires a completely different game plan for a secure, clean installation.
Handling Plasterboard Ceilings
Plasterboard, or drywall, is generally the easiest material to work with. For this, a standard hole saw on a cordless drill is your best friend. Pro tip: always use one with a dust catcher. It's a small touch, but clients really notice when you keep their space clean.
Before you even think about cutting, you need to check for hidden dangers. A stud finder is a good first step for locating joists, but it won't spot pipes or cables. I always drill a small pilot hole and poke a bent piece of wire or a small inspection camera into the void to have a look around. This simple check has saved me from some very expensive mistakes over the years.
Don't forget to consider the speaker's depth. Modern buildings can have incredibly shallow ceiling voids, sometimes less than 75mm. This is where those ultra-slim speaker models are worth their weight in gold, letting you get a flush fit where a standard unit just wouldn't work.
Installing In Suspended Ceiling Grids
You'll find suspended grid ceilings everywhere in offices and shops. While the tiles themselves are a breeze to cut with a utility knife, they have zero structural strength. Never mount a speaker directly to a ceiling tile. It's a recipe for disaster; the tile will sag over time and could eventually fall out completely.
To do this job properly, you need the right hardware:
- Tile Bridges or C-Rings: These are non-negotiable. These metal supports sit on top of the tile and span across the grid's T-bars, transferring the speaker's weight to the strong metal frame, not the flimsy tile.
- Reinforcement: For heavier speakers, I often add a small square of plywood on top of the tile for extra rigidity. It’s a simple trick that stops the tile from bowing and keeps everything looking neat for years to come.
A common mistake is overlooking the tile's acoustic properties. Most mineral fibre tiles offer next to no sound insulation. Without a back box, you'll lose a huge amount of sound into the ceiling void, leaving you with thin, tinny audio and a lot of noise bleeding to the floor above.
Tackling Concrete And Solid Ceilings
Concrete is, without a doubt, the biggest challenge. You really only have two ways to approach this: surface-mount the speakers or get creative and build a custom void.
Surface-mount speakers are the path of least resistance. You just fix them directly to the concrete with the right anchors. They do the job, but they stick out and might not fit with the client's vision for the space.
For that seamless, flush-mount look in a concrete ceiling, you have to build a void. This is a much bigger job and usually needs to be coordinated with other trades during the build phase. It typically involves creating a custom plasterboard drop-down or pattress to house the speaker. When planning this out, understanding different ceiling mounting bracket types and their compatibility with various ceiling structures is essential for figuring out the best way to create solid anchor points. It's a high-effort job, but for projects where aesthetics are everything, it delivers a high-end result.
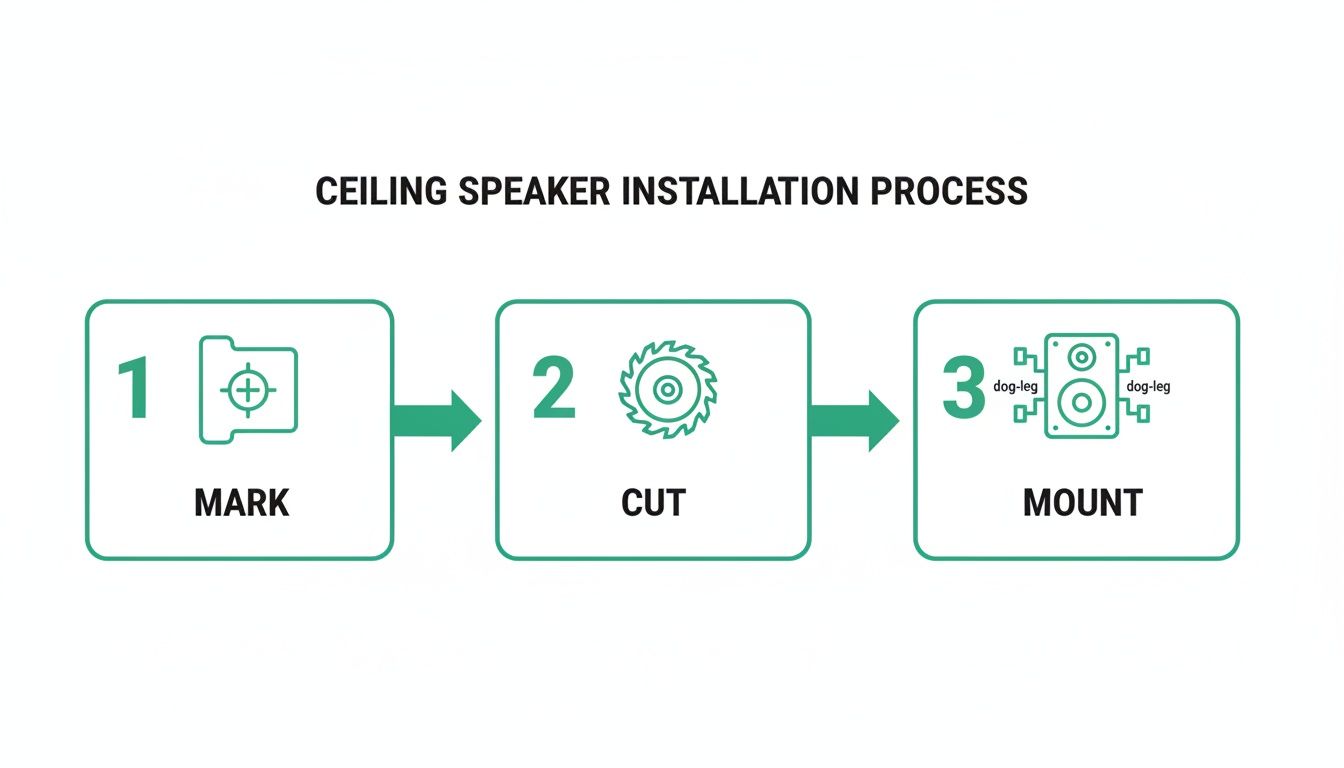
The Complete Cutting and Mounting Process
With your layout marked and the ceiling type sussed out, it’s time to bring the plan to life. This part of the job is all about precision and process. A clean cut and a rock-solid mount are the hallmarks of a professional install, guaranteeing not just a tidy finish but also a rattle-free performance for years to come.
First things first, you need to turn your pencil marks into perfectly sized holes. Almost every ceiling speaker you buy will come with a cardboard template. Don't just chuck it out with the packaging; this little bit of card is your most important guide. Pop it over your marked centre point, get it level, and trace around it lightly.
Before you go all-in with the saw, it's always smart to do one final check for hidden nasties. A quick pilot hole in the centre of your circle is all it takes. You can then poke a bit of stiff wire (an old coat hanger works a treat) or a small endoscope camera into the void. This final peek can save you from a costly and embarrassing run-in with a water pipe or electrical conduit.
Cutting Clean Holes for a Perfect Fit
For standard plasterboard, a good quality hole saw attached to a cordless drill is the tool for the job. If you want to keep the site immaculate—a detail your clients will definitely notice—get a hole saw with an integrated dust bowl. This simple attachment catches nearly all the plaster dust, saving you a massive clean-up job later.
When you start cutting, apply steady, even pressure and just let the saw do the work. Don't force it. That’s how you tear the paper facing on the plasterboard and end up with a messy, oversized hole. A clean edge is crucial for the speaker's bezel to sit flush and look the part.
Got a suspended ceiling? The process is even easier. A sharp utility knife is all you'll need. Just place the tile on a stable, protected surface and carefully cut along your traced line. The key here is to make several shallow passes instead of trying to plough through in one go. This helps prevent tearing the tile's surface and keeps everything neat.
Securing the Speaker with Dog-Leg Clamps
Once the hole is cut, you're ready to get the speaker in. Most in-ceiling speakers use a clever mechanism called dog-leg clamps or a similar rotating clamp system. These are small plastic or metal 'legs' that sit retracted when you push the speaker into the ceiling.
As you tighten the screws on the front of the speaker, these clamps swing outwards and then pull down, clamping firmly onto the back of the plasterboard or a ceiling tile bridge. The result is a secure, vibration-free fit.
Here’s how to nail the mounting every time:
- Check the Clamps: Before you offer the speaker up to the hole, double-check that all the dog-legs are swivelled inwards, well clear of the speaker's edge.
- Connect the Wires: Hold the speaker near the hole and connect the cable, making sure you get the polarity right (+ to + and - to -).
- Insert and Tighten: Gently push the speaker into place until its bezel is flush with the ceiling. Now, using a screwdriver, start tightening each mounting screw. Alternate between them, doing each one up a bit at a time, just like you would with wheel nuts on a car. This ensures the pressure is even and stops the speaker frame from warping.
- Feel for the Bite: You’ll feel the resistance increase as the clamps bite into the ceiling. As soon as the speaker feels snug, stop. Over-tightening can easily crack the plasterboard or break the clamp itself.
The Critical Role of Back Boxes and Fire Hoods
Mounting the speaker is only half the story. For compliance, performance, and peace of mind, what goes on behind the speaker is just as important. In the UK, fitting a fire hood is often a non-negotiable legal requirement.
According to UK Building Regulations, including standards like BS 5839 for fire safety, any hole cut into a fire-rated ceiling must have its integrity restored. A fire hood does exactly that, expanding in the event of a fire to seal the opening and stop flames from spreading through the ceiling void.
Beyond the vital fire safety aspect, a back box or fire hood also serves as an acoustic enclosure. This sealed box massively improves the sound quality in two ways. First, it stops sound from leaking into the ceiling void and annoying anyone on the floor above. Second, it provides a consistent, predictable volume of air behind the driver, which leads to a much tighter, punchier bass response.
Without one, your audio will sound thin and weedy. Think of it as giving the speaker its own perfectly sized cabinet, right there inside the ceiling.
Wiring Your System for Performance and Reliability
A clean, well-executed wiring job is the backbone of any professional audio installation. It’s the bit nobody sees, but it’s what dictates how the system performs and holds up over the years. Whether you're fitting a big 100V line system for a commercial job or a high-fidelity low-impedance setup for a single premium zone, getting the wiring right first time is everything.
The approach you take hinges entirely on the type of system you specced out during planning. Each has its own set of rules and best practices that, when you stick to them, guarantee a flawless result.
Mastering 100V Line Systems
The 100V line system is the workhorse of commercial audio, built for big spaces and easy expansion. The standard wiring method here is a ‘daisy-chain’, where you connect the speakers in parallel. You simply run a single cable from the amplifier to the first speaker, then from that speaker’s terminals on to the next one, and so on down the line.
The real skill in a 100V install is setting the power tappings on each speaker. These are usually adjusted with a little rotary switch or by connecting the cable to different terminals on the speaker's transformer. This is how you control the power each speaker pulls from the amp, and it's your main tool for balancing volume levels across different areas.
For instance, you might set the speakers in a quiet corridor to a 2.5W or 5W tap. But in a busy reception area, you’d crank them up to 10W or 20W for more punch—all running off the same cable.
To make sure you don't blow up the amp, you have to calculate your total load properly:
- Add Up the Taps: Tally up the wattage of every single speaker tap on that line. So, ten speakers set to 5W each gives you a total load of 50W.
- Leave Some Headroom: Never, ever run an amplifier at its maximum rated power. Make sure your total speaker load is no more than 80% of the amp's output. For a 100W amplifier, your load shouldn't go over 80W.
That 20% headroom is absolutely critical. It stops the amplifier from overheating and distorting the audio, which means you get clear sound and the whole system lasts a lot longer.
Low-Impedance Wiring Demystified
When you're working with low-impedance systems (usually 8 Ohm), the game changes. It's less about power taps and all about managing the total impedance load you're presenting to the amplifier. If you get this wrong, you’ll get poor sound quality or, worse, you could fry the amp's output stage. Your two main options are parallel or series wiring.
- Parallel Wiring: This is when you connect multiple speakers positive-to-positive and negative-to-negative. It’s the most common method, but it decreases the total impedance. Two 8 Ohm speakers wired in parallel create a 4 Ohm load.
- Series Wiring: Here, you connect the speakers in a chain—the positive of one to the negative of the next. This increases the total impedance. Two 8 Ohm speakers in series give you a 16 Ohm load.
Most of us stick to parallel wiring because it's more straightforward. But you have to do the maths carefully to ensure the final impedance is within the amp's safe operating range, which is typically between 4 and 8 Ohms. Pushing an amplifier into a load that's too low (like under 4 Ohms) will cause it to overheat and shut down, or worse.
Selecting the Right Cable
The final piece of the puzzle is picking the right cable. For any professional job in the UK, this decision comes down to performance and, just as importantly, building regulations.
For 100V line systems, a standard double-insulated 1.5mm² speaker cable will do the job for most runs. However, if you’re installing in a public building or running cables through air plenums (the space above a suspended ceiling), you must use Low Smoke Zero Halogen (LSZH) cable. It’s a non-negotiable safety requirement, as this cable emits very little smoke and no toxic halogen gases in a fire.
With low-impedance systems, cable thickness (its gauge) is far more critical. You need to minimise signal loss, especially over longer distances. A thicker cable has lower resistance, which means more of the amplifier's power actually reaches the speakers.
To make life easier, here’s a quick guide for choosing the right cable for your low-impedance runs. Using a thicker gauge than needed won't hurt, but going too thin will definitely cost you in performance.
Recommended Speaker Cable Gauge by Run Length
| Cable Run Length (Metres) | Recommended Gauge (mm²) | Speaker Impedance |
|---|---|---|
| 0 - 15m | 1.5mm² (16 AWG) | 8 Ohm |
| 15 - 30m | 2.5mm² (14 AWG) | 8 Ohm |
| 30 - 60m | 4.0mm² (12 AWG) | 8 Ohm |
| 0 - 30m | 1.5mm² (16 AWG) | 4 Ohm |
| 30 - 60m | 2.5mm² (14 AWG) | 4 Ohm |
Always check the speaker and amplifier specs, but this table is a solid starting point for most installations to ensure you're not losing precious power in the cable.
For systems that make wiring even simpler, it’s worth checking out our guide on how Power over Ethernet is used in modern audio installations.
Commissioning, Testing and Final Checks
With the speakers mounted and the wires tucked away, it's easy to think the job's finished. But hold on. The final commissioning stage is what really separates a decent install from a truly professional one. This is your last chance to check every connection, test every speaker, and make sure the system sounds exactly as intended before you pack up your tools.
Rushing this part is a false economy. It can lead to frustrating call-backs to fix simple things that could have been spotted in minutes. Treat it as your final quality assurance check before you hand over to a happy client.
First up, and arguably the most important check, is speaker polarity. If just one speaker in a zone is wired backwards (positive to negative), it'll be out of phase with the others. This creates phase cancellation, a weird phenomenon that literally sucks the bass out of the audio, leaving you with a thin, gutless sound.
Systematic Audio Testing
Once you've confirmed the polarity is spot on, it's time to get some audio running through the system. Don't just stick on a random radio station and call it a day. You need to listen critically for any tell-tale signs of an installation issue.
A great way to do this is with an audio sweep—a test tone that runs through the full frequency spectrum, from deep bass to high treble. As the tone plays through each speaker, listen closely for any unwanted noises.
Here’s what you’re hunting for:
- Rattles or Buzzes: These usually point to a loose dog-leg clamp, a vibrating ceiling tile, or a cable resting against the back of the speaker cone.
- Distortion: If the audio sounds fuzzy or crackly, you could be looking at a poor connection, a struggling amplifier, or even a damaged driver in the speaker itself.
- Volume Imbalances: For a 100V line system, this is your opportunity to confirm the tap settings are correct for each zone, ensuring you get the consistent audio levels you planned for.
A classic mistake is not checking every speaker individually. Always use the amplifier's zone controls or a simple balance fader to isolate each speaker. It makes it so much easier to pinpoint which unit has an issue, saving you a ton of guesswork later.
Compliance and Voice Alarm Checks
For a lot of commercial jobs, testing is about more than just sound quality—it’s about meeting regulations. Installations in public buildings have to meet strict standards to ensure they work reliably in an emergency.
UK regulations like BS 5839 (fire detection) and EN 54-16 (voice alarm) often require specific plenum-rated speakers. These are certified for safe use in suspended ceilings, which are common in retail and hospitality.
If your system includes voice alarm (VA) or public address (PA) functions, your testing has to include a speech intelligibility check. This means playing pre-recorded emergency messages or clear speech through the system and walking the entire space. You need to be sure that announcements are crystal clear everywhere, from the quietest corridor to the busiest public area. For a closer look at matching the right gear, our ceiling speakers with amplifier setup guide has loads of detailed advice.
Common Issues and Quick Fixes
Even the most carefully planned jobs can throw a curveball. Knowing how to fix common snags on the spot is a key skill.
| Problem | Likely Cause(s) | How to Fix |
|---|---|---|
| One Speaker is Silent | Bad connection, wrong wiring, or a dead speaker. | Re-check the connections at the speaker and the amp. To be sure, swap it with a speaker you know works to isolate the problem. |
| System Hum or Buzz | Electrical interference, often from power cables. | Make sure your speaker cables aren't running right next to mains power lines. Also, check the amplifier has a solid earth connection. |
| Volume is Too Low | Incorrect 100V tap setting or the amp gain is down. | Double-check the wattage tap setting on the speaker. Then check the master volume and zone gain controls on the amplifier. |
The very last step is the client handover. Walk them through the system, show them the basic controls, and leave them with any relevant paperwork. A clean site and a perfect-sounding system are the best business card you can leave behind.
On-Site Questions Answered
Even the most experienced installers hit a snag or need a quick sanity check on-site. We’ve pulled together the most common questions our technical team fields from pros in the middle of a job, giving you straight answers to get things sorted and deliver a perfect installation.
How Far Apart Should Ceiling Speakers Be?
There's no single magic number here; the right spacing depends entirely on what you're trying to achieve with the audio. Context is everything.
For general background music in a retail space or a bustling restaurant, a solid rule of thumb is to space the speakers at roughly twice the ceiling height. So, for a standard 2.4-metre ceiling, you'd be looking at placing them around 4.5 to 5 metres apart. This approach creates a lovely, balanced wash of sound where no single speaker is too obvious.
However, if you're setting up a more focused listening area—say, for a high-end bar or a boardroom video conferencing setup—you'll want to pull them much closer. Aim for 2 to 3 metres apart, making sure they are perfectly equidistant from the main listening position to create a proper stereo image. For public address systems where speech intelligibility is the top priority, you might bring them in even tighter to guarantee totally even coverage and kill any dead spots.
Are Fire Hoods and Back Boxes Actually Necessary?
For almost any commercial installation in the UK, the answer is a firm yes. This isn't just best practice; it's frequently a legal requirement. Fire hoods (or back boxes) are crucial for two very different reasons, affecting both safety and the final sound quality.
First and foremost, it's about compliance. UK Building Regulations state that the fire integrity of a ceiling must be maintained. The moment you cut a hole for a speaker, you've compromised that fire barrier. An intumescent fire hood is designed to restore it, expanding in the event of a fire to seal the hole and stop fire and smoke from spreading through the ceiling void.
Beyond the vital safety aspect, a fire hood or back box also serves as a proper acoustic enclosure. This simple addition can drastically improve audio performance. It stops sound from bleeding into the ceiling void, which immediately tightens up the bass response and gives you a much more consistent, predictable sound from every speaker.
Can I Mix and Match Different Speakers on a 100V Line System?
Absolutely. In fact, this is one of the biggest strengths of a 100V line system and a primary reason it’s the go-to for commercial audio. You have the freedom to mix different speaker models, sizes, and power ratings all on the same amplifier circuit without needing complex impedance calculations.
This is ideal for venues with different zones. A restaurant, for instance, could have small, discreet 3-inch speakers in the toilets, more powerful 6-inch models in the main dining area, and even a weatherproof horn speaker on the outdoor terrace—all running from one amplifier.
The one golden rule is to ensure the total combined wattage of all the speaker taps doesn't go over 80% of the amplifier's rated output power. Stick to that, and you can design a truly bespoke system perfectly matched to each area.
What's the Best Way to Run Cables in a Finished Ceiling?
Retrofitting cables into an existing, boarded ceiling just takes a bit of planning and the right tools. Your best friend for this job will be a set of flexible pull rods (often called ‘fish tape’ or draw rods).
Once your speaker holes are cut, find an access point—maybe an existing downlight hole or a small, neat access panel you've cut—and feed the rods through the void from one speaker position to the next. When it pops through, securely tape your speaker cable to the end and gently pull it back through.
If you come up against joists running across your cable path, you may have to drill small, tidy holes through them to get the wire across. Always double-check what's permissible before drilling into structural joists. Most importantly, always route your speaker cables well away from any mains power lines to avoid picking up electrical interference, which will manifest as an annoying hum through the speakers.
For professional advice on system design or to explore our full range of commercial audio solutions, visit Epic Audio Ltd or contact our technical sales team. Find everything you need for your next project at https://epicaudio.co.uk.