
Ever found yourself in a beautifully designed retail space, hotel lobby, or a minimalist home and noticed the audio just seems to be part of the atmosphere? That’s the magic of an in-ceiling loudspeaker. It’s an audio device engineered to be mounted flush into a ceiling, delivering fantastic sound quality while staying almost completely out of sight.
They’ve become a real cornerstone of modern architectural audio, giving you that immersive sound for both background music and crucial announcements without the visual distraction of old-school box speakers.
Why In Ceiling Loudspeakers Are a Modern Audio Essential
The whole point of a well-designed distributed audio system is that you don't notice it's there. The sound feels like it’s coming from everywhere and nowhere at once, creating a consistent, engaging environment. That’s precisely what an in-ceiling loudspeaker is built for: integrating high-fidelity audio right into the fabric of a building.
This demand for discreet tech isn't a surprise. There's a huge trend in both commercial and residential design right now pushing for clean lines and uncluttered spaces. Clients just don't want bulky speaker boxes taking up floor or wall space anymore. They want systems that are heard, not seen, protecting the integrity of their interior design.
The Rise of Integrated Audio
This move towards 'invisible' tech is about more than just aesthetics; it's a practical choice. An in-ceiling loudspeaker is a fundamental part of today's integrated systems, whether it’s for a smart home or a professional public address setup. They are simply the most practical way to get widespread, even sound coverage without making compromises.
There are a few key things driving their popularity:
- Aesthetic Integration: Most come with paintable grilles, so you can match them to any ceiling colour and make them effectively disappear.
- Space Efficiency: Getting the audio system up into the ceiling frees up precious floor and wall space. This gives designers and clients much more flexibility with room layouts and furniture.
- Superior Sound Distribution: A properly laid-out system gives you consistent volume and clarity across the whole area. You get rid of the "hot spots" and quiet zones you often get with a single pair of speakers.
The market numbers back this up. The in-ceiling speaker market is booming, with projections for Western Europe alone set to grow from $6.32 billion to $8.71 billion by 2029. This isn't just a niche product; it’s a direct response to a massive demand for discreet, integrated audio in new builds and refits. You can dive deeper into the numbers in this global market report on in-ceiling speakers.
For any AV installer, getting to grips with in-ceiling loudspeakers isn’t just a nice-to-have skill anymore; it's essential. These systems are the perfect answer when a client wants technology that enhances a space without intruding on it—the perfect blend of performance and subtlety.
Ultimately, these speakers represent a much more modern way of thinking about audio design. They perfectly meet that contemporary expectation for technology that’s seamlessly woven into the places we live and work. For any AV integrator, understanding how and where to use them is crucial for delivering the sophisticated solutions clients are asking for.
In Ceiling Loudspeaker Application Overview
To give you a quick idea of where these speakers shine, here’s a breakdown of their most common applications and the main benefit they bring to each one.
| Application Area | Primary Use Case | Key Benefit |
|---|---|---|
| Retail & Shops | Background Music & Announcements | Creates a welcoming atmosphere without visual clutter. |
| Hospitality (Hotels, Bars) | Ambient Music & Public Address | Even sound coverage across lobbies, hallways, and dining areas. |
| Corporate Offices | Paging, Sound Masking & Music | Enhances productivity and communication discreetly. |
| Educational Facilities | Classroom Audio & Paging | Clear, intelligible speech for every student. |
| Residential Homes | Multi-room Audio & Home Cinema | Seamless, high-quality sound that preserves interior design. |
| Houses of Worship | Voice Reinforcement & Music | Ensures every part of the congregation can hear clearly. |
| Public Spaces (Airports) | Voice Alarm & Announcements | Delivers critical information with maximum clarity and reach. |
As you can see, their versatility makes them a go-to solution for installers working across a huge range of sectors.
Choosing Your System: 100V Line vs Low Impedance
Before you even think about cutting holes or running cables, there's a foundational choice you have to make: the system's electrical backbone. Every in-ceiling loudspeaker project boils down to one of two camps: 100V line or low impedance. Nail this decision from the get-go, and you're on track for a reliable, cost-effective install. Get it wrong, and you're in for a world of pain.
Think of it like choosing the right vehicle for a job. A 100V line system is your long-haul lorry. It’s engineered to push an audio signal over huge distances to a massive number of speakers without breaking a sweat. This makes it the undisputed king for large-scale commercial jobs.
A low-impedance system, on the other hand, is more like a high-performance sports car. It's built for shorter runs where the absolute priority is audio fidelity. It's the go-to when sound quality is everything.
Understanding 100V Line Systems
At its core, a 100V line system is a type of constant voltage system. The magic happens thanks to a transformer, one fitted to the amplifier's output and another on every single speaker. The amp-side transformer "steps up" the voltage, and the speaker-side one "steps it down" again.
This high-voltage, low-current approach slashes power loss (signal degradation) over long cable runs. This means you can get away with using thinner, cheaper speaker cable and simply daisy-chain a load of speakers together without getting bogged down in complex impedance maths. It's an incredibly efficient and scalable way to cover large spaces.
The benefits are pretty clear:
- Long Cable Runs: You can happily send audio signals hundreds of metres down a cable with minimal power drop.
- Scalability: Need to add or remove a speaker? No problem. The system doesn't need a complete recalculation.
- Easy Power Setting: Each speaker has transformer "taps" that let you set its power level (e.g., 6W, 3W, 1.5W). This gives you granular volume control across different areas or zones.
It's this flexibility that makes 100V line the industry standard for retail shops, warehouses, schools, and airports—basically, anywhere you need plenty of speakers for background music and clear announcements.
When Low Impedance Is the Right Choice
Low-impedance systems, typically running at 4, 8, or 16 ohms, work without transformers muddying the signal path. This direct connection between the amp and the speaker gives you a much better damping factor and a wider frequency response. The result? Far superior audio quality.
This is the kind of setup you'll find in home cinemas, high-end restaurants, recording studios, and small bars where musical detail really matters. The sound is richer, the bass is tighter, and the highs are crisper.
But this quality comes with trade-offs. Low-impedance signals suffer from serious power loss over distance, so you'll need thicker, more expensive cables. Wiring also demands careful impedance matching to avoid frying your amplifier. For example, hook up two 8-ohm speakers in parallel and you present a 4-ohm load to the amp—it had better be stable enough to handle it. You can learn more about how to choose the right amplifier for voice and music applications in our detailed guide.
100V Line vs Low-Impedance Systems at a Glance
To make it even clearer, here’s a quick head-to-head comparison to help you decide which system is the right fit for your next project.
| Feature | 100V Line System | Low-Impedance (8 Ohm) System |
|---|---|---|
| Best For | Large commercial spaces, BGM, public address | High-fidelity audio, critical listening, small venues |
| Sound Quality | Good for voice & BGM, slightly limited frequency range | Excellent, full-range audio with better dynamics |
| Cable Runs | Very long (100s of metres) with minimal signal loss | Short (ideally <20m) to avoid significant power loss |
| Wiring Complexity | Simple daisy-chain wiring, no impedance maths | Requires careful series/parallel impedance calculations |
| Number of Speakers | Many speakers can be connected to a single amplifier | Limited by amplifier's minimum stable impedance |
| Speaker Control | Individual speaker power/volume set via transformer taps | All speakers on a channel receive the same power |
| Cost-Effectiveness | Highly cost-effective for large-scale installations | Can become expensive due to heavier-gauge cabling |
Ultimately, the choice comes down to what you're trying to achieve. One isn't inherently "better" than the other; they're just different tools for different jobs.
A 100V line system prioritises efficiency and scalability for large areas, while a low-impedance system prioritises audio fidelity for critical listening environments. The project's scale and primary purpose will always dictate the correct choice.
Specialised Speaker Variations
Beyond the core system type, you'll also run into specialised versions of in-ceiling speakers designed for specific environments and regulations. Two of the most common you’ll see are IP-rated and EN54-compliant models.
IP-Rated Speakers: The Ingress Protection (IP) rating tells you how well a speaker can stand up to dust and water. A speaker rated IP44, for instance, is protected from solid objects bigger than 1mm and water splashes from any direction. This makes them non-negotiable for installs in bathrooms, kitchens, swimming pool areas, and sheltered outdoor spots.
EN54-24 Compliant Speakers: When it comes to life safety systems, your average speaker just won't cut it. EN54-24 is a mandatory European standard for any loudspeaker used in a fire detection or voice alarm (VA) system. These speakers are built from fire-resistant materials and come with a ceramic terminal block and a thermal fuse. This ensures they stay working during a fire, allowing critical evacuation messages to get through when it matters most.
Making Sense of Technical Specifications

A spec sheet for an in-ceiling loudspeaker can feel like trying to read a foreign language. But getting to grips with these numbers is exactly what separates a good installation from a great one. These aren’t just abstract figures; they’re the blueprint for predicting precisely how a speaker will perform in the real world.
Once you know how to decode these specifications, you can move beyond guesswork. You’ll be able to confidently pick the right product for the job, design a system that nails the client’s brief, and dodge costly mistakes. Let’s break down the metrics you’ll see time and time again.
Power Handling in Watts
Think of power handling (Watts) as a speaker's endurance rating. It’s telling you how much continuous power it can safely take from an amplifier before things start to go wrong. An overpowered speaker can literally burn out its voice coil, while an underpowered amp pushed too hard will introduce nasty distortion.
For low-impedance systems, it’s all about matching the amplifier's RMS output to the speaker's power handling. On a 100V line system, the spec shows the speaker’s maximum capability, but you'll almost always be using much less power via the transformer taps. A higher power handling doesn't automatically mean a "better" speaker, just that it's built for more demanding jobs.
Dispersion Angle and Coverage
The dispersion angle is easily one of the most practical specs for planning your layout. It measures how widely the sound spreads from the speaker, usually at a specific frequency (e.g., 120° at 2kHz). The best analogy is a torch beam: a wider beam covers more area, whereas a narrower one is more focused and intense.
A wider dispersion angle means you can often get away with fewer speakers to cover a room, as their sound patterns overlap more forgivingly. This is perfect for general background music. But for spaces where every word needs to be crystal clear, like a boardroom, a narrower dispersion might be better to direct sound exactly where you want it and minimise reflections bouncing off the walls.
Understanding the dispersion angle is the key to creating even, consistent audio coverage. It directly informs your speaker spacing, preventing annoying "hot spots" (too loud) and "dead zones" (too quiet) within a room.
Frequency Response
Frequency response shows the range of sound frequencies a speaker can reproduce, measured in Hertz (Hz). The human ear can generally hear from around 20Hz (deep, rumbling bass) to 20,000Hz (or 20kHz, crisp high notes). A typical spec sheet might list a speaker’s range as 65Hz – 20kHz.
- For music: A wider frequency response, particularly one with a lower starting number, points to better bass. This creates a richer, fuller sound that you can feel as well as hear.
- For speech: The really critical range for vocal clarity sits between roughly 300Hz and 3kHz. Any speaker destined for a public address or voice alarm system needs to perform well here.
This single number gives you a snapshot of the speaker's sonic personality—is it built for clear-as-day announcements or for full-bodied musical performances?
Sound Pressure Level (SPL)
Sound Pressure Level (SPL), measured in decibels (dB), is all about how loud a speaker can get. The spec sheet usually lists this as a sensitivity rating, often written as "1W/1m". So, a rating of 88dB (1W/1m) means the speaker will produce 88dB of sound when you're one metre away and feeding it just one watt of power.
This figure is your guide to hitting the right volume for the space. A speaker with higher sensitivity is simply more efficient—it produces more volume with less power. Remember, for every 3dB increase in volume, you need to double the amplifier power, so a more efficient in-ceiling loudspeaker can end up saving you a fair bit on amplification.
Transformer Taps and Impedance
On 100V line systems, transformer taps are the settings on the speaker that let you choose how much power it draws from the amplifier. You might see options for 6W, 3W, and 1.5W. This gives you incredible flexibility to set different volume levels in different zones, all running from the same amplifier line. You can easily make the speakers in a quiet corridor much softer than the ones in a busy reception area.
For low-impedance systems, the number you care about is impedance, measured in Ohms (Ω). Most are 8Ω. This figure is vital for calculating the total load you're putting on the amplifier. Wire two 8Ω speakers in parallel and you create a 4Ω load; you have to be sure your amp is stable at that impedance, otherwise it'll overheat or shut down. As you dive into the technicals, don't forget how the ceiling itself affects sound; exploring soundproof plasterboard options can make a huge difference to the final acoustic performance.
Mastering Speaker Placement for Perfect Sound
Let’s be honest, even the most expensive in-ceiling speaker will sound dreadful if you get the placement wrong. This is where theory meets the real world, and getting the positioning right is probably the single biggest factor in achieving great audio. It's what separates a patchy, uneven sound field from a genuinely seamless and immersive listening experience.
The ultimate goal is simple: create a uniform blanket of sound. You want to banish those distracting hotspots where the audio is far too loud, and get rid of the frustrating dead zones where it all but disappears. Nailing this is a mix of straightforward calculations and a few tried-and-tested layout patterns that suit what you're trying to achieve.
Calculating Your Ideal Speaker Spacing
First things first, you need to work out the ideal distance between each speaker. This isn't just guesswork; it's based on two things you should already know: the ceiling height and the speaker's dispersion angle. There's a simple rule of thumb that gives you a solid place to start.
Think of a cone of sound projecting down from each speaker. For general background music, you want these cones to overlap just a little at ear level (which we typically take as 1.5 metres from the floor). This ensures you get consistent coverage without any obvious gaps.
A well-used formula for spacing is: (Ceiling Height - Ear Height) x 1.4. So, for a standard 2.4-metre ceiling, your calculation would look like this: (2.4m - 1.5m) x 1.4 = 1.26m between each speaker. This gives you a really strong foundation for your layout plan.
If you’re working on a system for announcements or more prominent foreground music, you might want to tighten that spacing up a bit. A bigger overlap boosts clarity and makes sure every word is heard.
Proven Layouts for Common Scenarios
While that calculation gives you the spacing, the actual pattern you use depends entirely on the room's purpose. There really is no 'one-size-fits-all' answer here; the strategy has to match how the space is actually used.
Here are a few established layouts for different environments:
- Uniform Coverage (Offices, Retail): For big, open areas that need even background music or paging, a simple grid pattern is the go-to. You place speakers in neat lines, equally spaced from each other and the walls, to create that consistent blanket of sound.
- Home Cinema (Dolby Atmos): Here, placement is much more specific. In-ceiling speakers are brilliant for the height channels that create that 'dome' of sound. You'll typically place one pair slightly in front of the main listening spot and another pair slightly behind.
- Corridors and Long Rooms: A grid doesn't make sense here. Instead, a single line of speakers running right down the centre of the hallway is far more effective, directing sound efficiently along the length of the space.
Tackling Common Installation Hurdles
Of course, planning is one thing, but installation is another. You'll almost certainly run into physical obstacles in the ceiling void. The usual culprits are ceiling joists, pipework, and having to deal with sound leaking into the room above.
A stud finder is your best friend before you start cutting holes. If a joist is sitting exactly where you planned to put a speaker, you’ll have to adjust. It’s always better to shift the entire grid a few centimetres than to have one speaker obviously out of line, as that can really mess with the symmetry of the sound. For a more detailed walkthrough, our practical guide to mounting ceiling speakers covers these physical challenges in much more depth.
Another critical thing to think about is the space behind the speaker itself. An in-ceiling loudspeaker installed in an open ceiling void can lose a massive amount of its bass response and, just as importantly, leak a lot of noise into the room above.
The professional solution is to use a back box. This is just an enclosure that fits behind the speaker, and it does two vital jobs:
- Improves Audio Performance: It creates a sealed, acoustically optimised chamber. This really tightens up the bass and mid-range frequencies, giving you a much cleaner, more controlled sound.
- Reduces Sound Bleed: It contains all that rear-firing sound, stopping it from travelling through the floorboards and annoying whoever is on the floor above.
Wiring and Zoning Your Audio System
Getting an in-ceiling loudspeaker connected is one thing, but architecting a system that's robust, flexible, and dead simple to control is what separates a good job from a great one. This is where we stop thinking about individual speakers and start looking at the bigger picture—the system as a whole. It all comes down to smart wiring, intelligent zoning, and getting your power calculations spot on.
A well-designed system isn't just reliable; it gives the end-user the intuitive control they expect. The right approach here transforms a simple collection of speakers into a powerful, seamless audio distribution network.
Wiring Strategies for System Type
How you physically wire everything up depends entirely on whether you've gone for a 100V line or a low-impedance system.
For 100V line installations, the process is beautifully straightforward. You can simply daisy-chain the speakers, running a single two-core cable from the amplifier to the first speaker, then from that one to the second, and so on. It's an efficient and cost-effective method that's perfect for covering large areas.
Low-impedance systems, on the other hand, need a bit more thought. You’ll typically run individual cables from the amp to each speaker, or maybe to small clusters of speakers wired in series or parallel. The main goal here is to carefully manage the total impedance load hitting the amplifier to make sure it stays within its safe operating limits.
The Power of Audio Zoning
Zoning is the art of carving up a large space into smaller, independently controllable audio areas. Think of a hotel: the lobby needs some gentle background music, the bar wants a more upbeat playlist turned up a bit louder, and the conference rooms demand crystal-clear audio for presentations. A properly zoned system lets you deliver exactly that, all managed from one central amplifier or matrix switcher.
This infographic lays out the simple process for planning your speaker positions, which is the physical foundation for effective zoning.
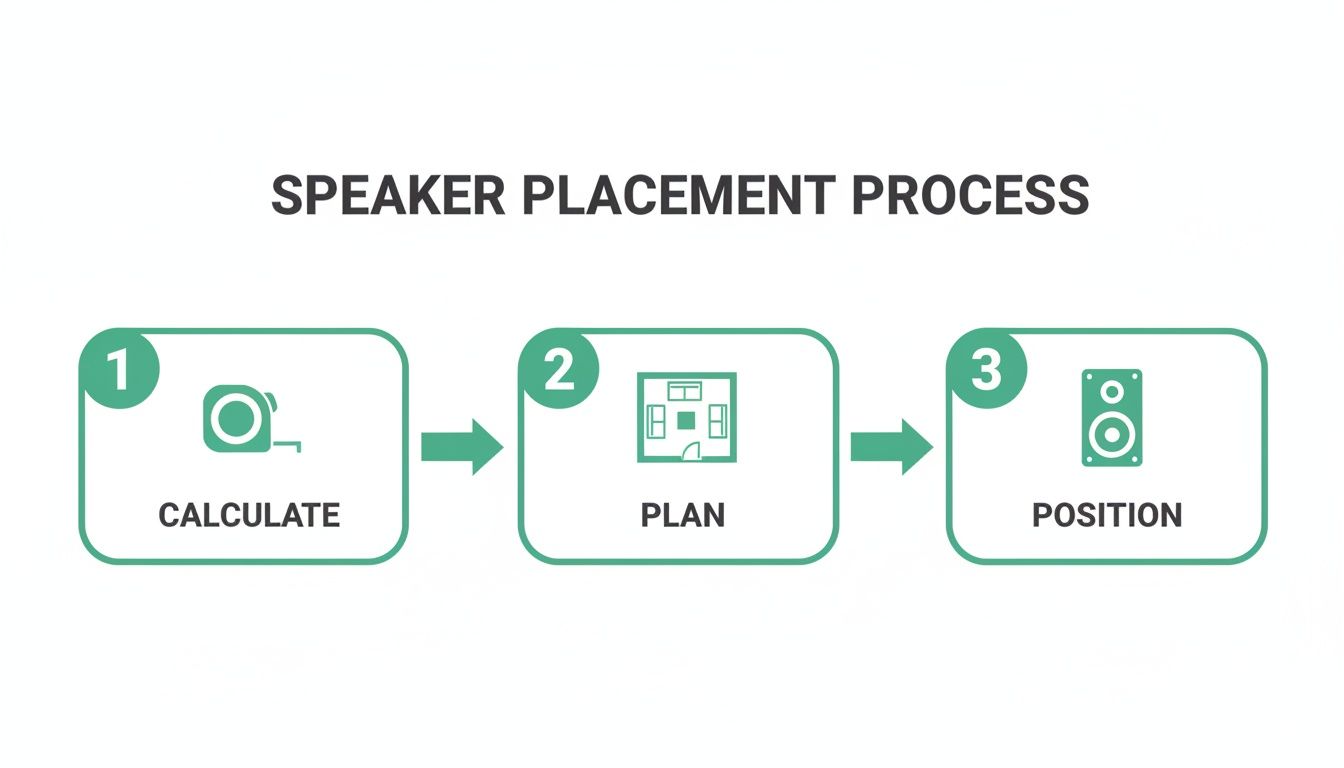
The key takeaway is that planning is the crucial step that sits between raw calculation and the physical installation. It’s the blueprint for both placement and zoning.
There are a few ways to create these zones:
- Use a multi-channel amplifier: Each channel can power its own separate zone.
- Bring in an audio matrix switcher: This is the ultimate in flexibility, letting you route any input source to any output zone you like.
- Use simple volume controls: For straightforward 100V line systems, you can just install in-wall attenuators for each zone.
The trend towards seamless architectural integration is undeniable. New home builds now incorporate in-ceiling speakers in 22% of properties, a massive jump from just 8% a few years back. This boom is part of a global market for in-wall/in-ceiling speakers now valued at $3.9 billion, highlighting just how important well-planned multi-room systems have become.
Calculating Amplifier Power Loads
To build a system that won't let you down, you have to be certain your amplifier can comfortably power every speaker connected to it. Overloading an amp is a fast track to distorted sound and, eventually, total failure.
For 100V line systems, the calculation is just simple addition. Add up the power tap settings of every single speaker on one amplifier channel.
Example: Imagine you have 10 speakers on a line. Five are tapped at 6W and the other five are at 3W. The total load is (5 x 6W) + (5 x 3W) = 30W + 15W = 45W. For peace of mind, you should always leave at least 20% headroom. So, you'd need an amplifier with a minimum RMS output of 54W (45W x 1.2).
With low-impedance systems, you're focused on impedance, not wattage. Your job is to make sure the total parallel or series impedance of the connected speakers doesn't drop below the amplifier's minimum stable rating (which is often 4 ohms).
If you’re tackling a bigger project, you can get into the nitty-gritty by checking out our guide on designing a speaker system for multiple rooms.
Your Essential Pre-Installation Checklist
Before you cut a single hole or pull a single cable, running through a methodical pre-installation check is the best way to guarantee a smooth project. Rushing this stage is just a false economy—it almost always leads to costly fixes and annoying delays down the line. To get the install right the first time, you need to prepare thoroughly, just like you would with a comprehensive home renovation checklist for any other major job.
This final checklist is designed to be a practical, on-site reference, boiling down all the key decisions we've covered. Get into the habit of running through these questions on every project, and you’ll find no detail gets missed.
Defining the Project Scope
First up, you absolutely have to clarify the fundamental requirements with the client. So many jobs go sideways because of a simple misunderstanding of the primary goal, leading to the wrong type of in-ceiling speaker being specified from the get-go.
- Primary Use Case: What's the system really for? Is it for some subtle background music, crystal-clear PA announcements, or is this a high-fidelity setup for critical listening in a home cinema?
- Audio Source: What's going to be playing through it? Compressed audio from a streaming service has very different demands than uncompressed local files or a live microphone feed.
- Client Expectations: Crucially, what does a successful outcome actually sound like to them? Do they want perfectly even coverage everywhere, or are there specific listening zones that really matter?
Assessing the Environment
Next, get your eyes on the physical space. The room itself dictates not just which speakers to choose, but also where they should go and what acoustic curveballs you might face during the installation.
The most common installation mistake is failing to properly account for the room. High ceilings, hard surfaces like glass and tile, and high background noise will all dramatically change the final sound. A quick site survey is completely non-negotiable.
Be sure to consider these critical factors:
- Acoustic Properties: Is the room full of soft furnishings that'll soak up sound, or is it an echo chamber full of reflective surfaces?
- Ambient Noise: How loud is the space to begin with? A quiet library has totally different reinforcement needs compared to a bustling restaurant or a busy bar.
- Physical Obstructions: Have a proper look in the ceiling void. You need to check for hidden pipework, ducting, and joists that could get in the way of your planned speaker locations.
- Environmental Conditions: Will the speakers be exposed to moisture, steam, or extreme temperatures? This is a simple one, but it'll tell you straight away if you need to spec an IP-rated model.
On-the-Job Questions, Answered
Even the most experienced installers hit a snag or have a question pop up mid-job. Here are some clear, straightforward answers to the questions we hear most often about in-ceiling loudspeakers, designed to get you sorted and moving forward with confidence.
How Many In-Ceiling Loudspeakers Do I Actually Need for a Room?
This really comes down to the room's size and, just as importantly, the height of the ceiling. For most smaller spaces, say up to around 14 square metres, you can usually get great background music coverage with a single pair of speakers.
When you're dealing with larger rooms, you'll need a few more to get that smooth, even sound field without any obvious hotspots or dead zones. A solid rule of thumb is to space your speakers somewhere between 1.8 and 3 metres apart. The higher the ceiling, the more you can stretch that distance, as the sound has more room to disperse before it reaches ear level.
Can I Fit In-Ceiling Speakers in a Bathroom or Kitchen?
Yes, you absolutely can, but you must use the right tool for the job. Any area where humidity, moisture, or the odd splash of water is a possibility demands an IP-rated (Ingress Protection) speaker. No exceptions.
You'll want to look for a model with at least an IP44 rating. This certification guarantees it’s protected against solid objects bigger than 1mm and, crucially, water splashes from any direction. Putting a standard speaker in a damp environment is just asking for component failure, and it's a real safety hazard.
Is a Back Box Really Necessary?
While it might not be strictly mandatory for every single installation, we always recommend using a back box for a truly professional result. An in-ceiling loudspeaker is engineered to perform within a specific air volume, and a back box is what creates that perfect acoustic environment.
Think of a back box as having two critical jobs: first, it dramatically improves the speaker's bass and mid-range performance by giving it a consistent, predictable enclosure. Second, it acts as a sound barrier, stopping audio from bleeding into the floor or room above and preventing those dreaded noise complaints.
Can I Paint the Speaker Grilles to Match the Ceiling?
Of course! This is one of the biggest selling points for in-ceiling speakers. Most modern grilles are specifically designed to be painted, which allows them to blend in so perfectly with the décor that they become practically invisible.
For a flawless finish, just follow these steps:
- Always take the grille off the speaker before you start painting.
- Use a spray paint, not a brush. A brush will almost certainly clog up the tiny perforations in the grille.
- Apply a few light, even coats instead of one heavy one. This keeps the grille acoustically transparent.
- Make sure the paint is completely dry before you pop the grille back on.
What’s the Real Difference Between a Coaxial and a Full-Range Speaker?
The key difference is in how they create sound. A full-range speaker relies on a single driver to reproduce the entire audio spectrum, from low to high. They're a cost-effective solution and work brilliantly for clear voice announcements and general background music.
A coaxial speaker, on the other hand, is a bit more sophisticated. It has two separate drivers working together: a larger woofer for the low frequencies and a smaller tweeter, mounted right in the centre, to handle the high frequencies. This two-way design delivers far superior audio fidelity, with richer bass and crisper, more detailed highs, making it the go-to choice for high-quality music systems and home cinema setups.
For expert system design and access to a complete portfolio of commercial audio solutions, trust Epic Audio Ltd. Explore our trade offerings and get the support you need for your next installation at https://epicaudio.co.uk.